It doesn’t matter what kind of photography you do, there will be times when an unwanted element in one of your pictures needs to be taken out in Photoshop. Here are six different techniques to use to remove practically anything from your images.
We’ve all been there: you press the shutter button on your camera and are fairly confident that you got the shot you wanted. It’s not until you inspect things later that you notice something in the picture that spoils what is otherwise a great shot. An unfortunate shadow, that annoying photobomb, or an unavoidable eyesore in the background are just a few enemies of the photographer.
Thankfully, we are not alone in this battle for the perfect picture as we have Photoshop on our side to help remove many of the things we don’t want to be there. While photo editing programs these days can do a lot of the heavy lifting to “Photoshop out” unwanted items, the end results automatically made for you by the computer can sometimes be rather disappointing.

To be fair to the editing program, it’s only as good as the information it has to work with. Tightly cropped canvases, busy patterns, or extreme areas of light and dark can all confuse the computer when it tries to wave its magic wand on your image. It’s for this reason that you can’t always rely on Photoshop to remove things for you. Luckily for us, there are several different ways we can erase objects in our images and by knowing each technique, you stand a good chance that at least one or more of them will be able to give you the desired outcome you want.
Here are six different ways you can attempt to remove items from your images in Photoshop.
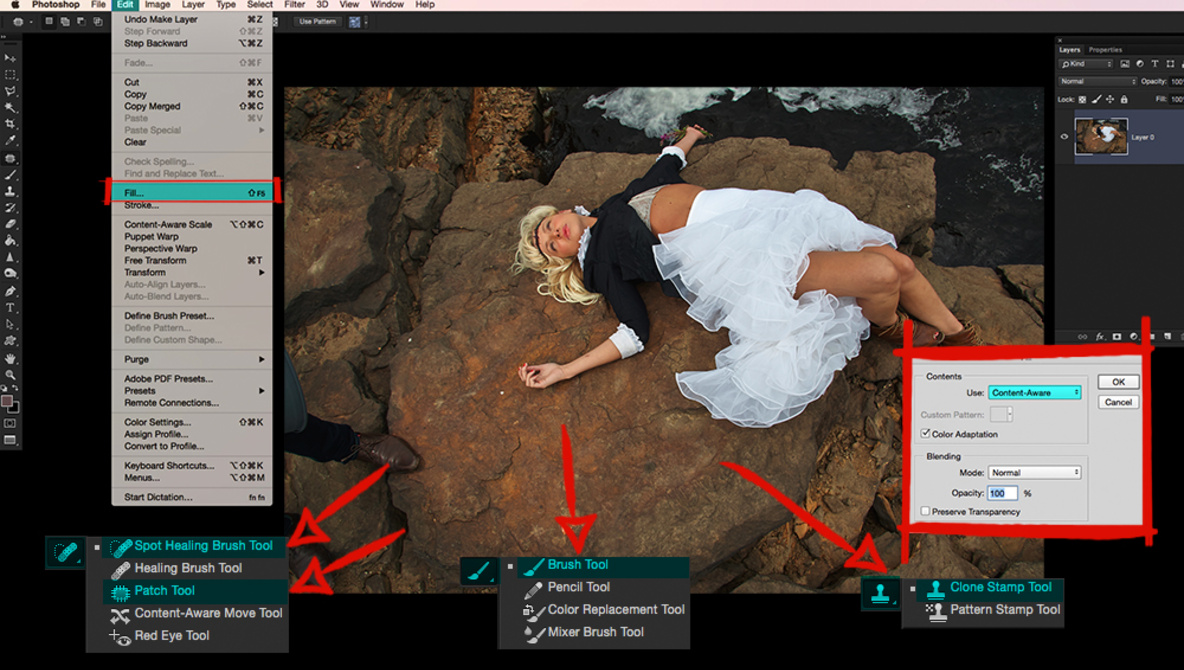
1. Content-Aware

The Content-Aware feature in Photoshop is a powerful tool for removing unwanted items in your images with just a few clicks of the mouse. This is always the first thing I will try when attempting to erase something. To use the Content-Aware tool, you must first make a selection around the object to be removed. Make sure you give this selection a few pixels breathing space all around it for the best results. Navigate to “Edit,” followed by “Fill,” which will bring up a screen where you can select “Content Aware”. Next, click “Ok” and let Photoshop work its magic.
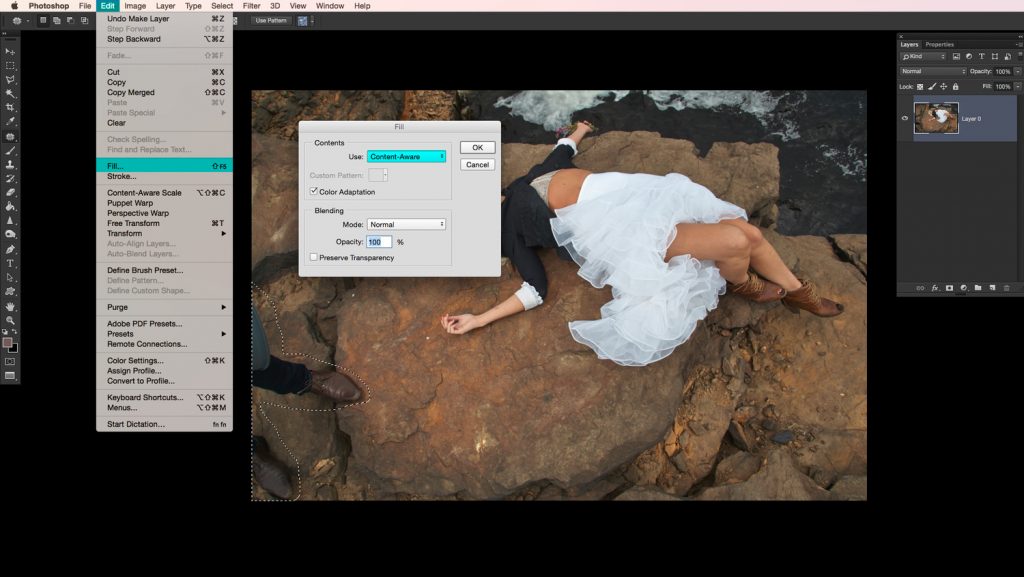
Depending on the picture, Content Aware can sometimes be a little hit and miss. If you are not having much success with this tool in your image, then it’s time to try one of the other methods in this list.
2. Patch Tool
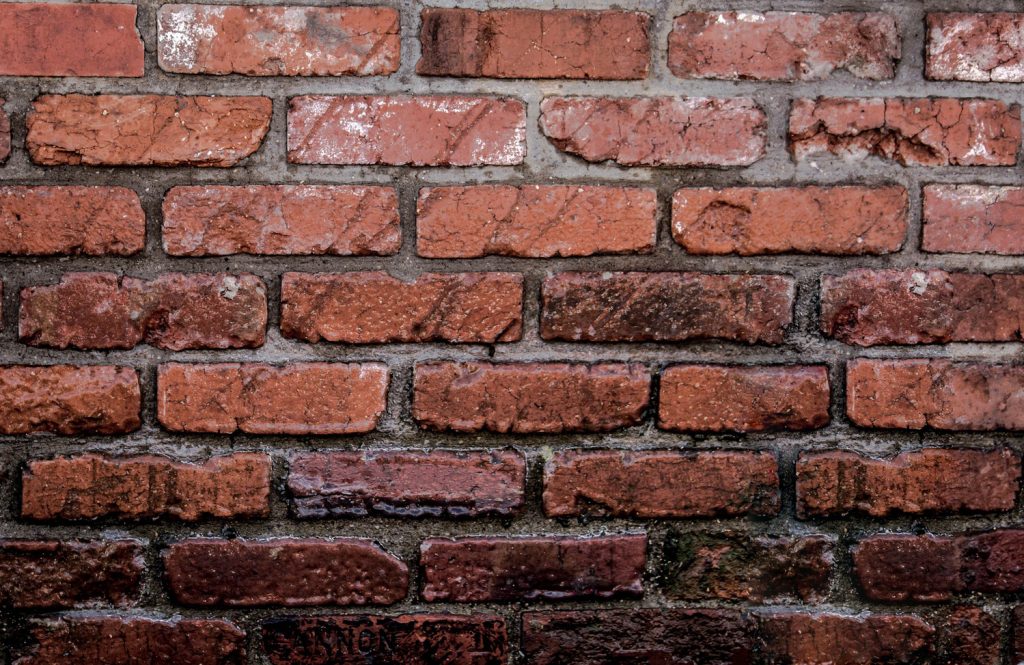
The Patch Tool is my favorite removal tool as you have much more control when you compare it to the automatic nature of Content-Aware. With this tool, you tell Photoshop which part of the image you want the program to use when it attempts to replace unwanted areas of the picture.
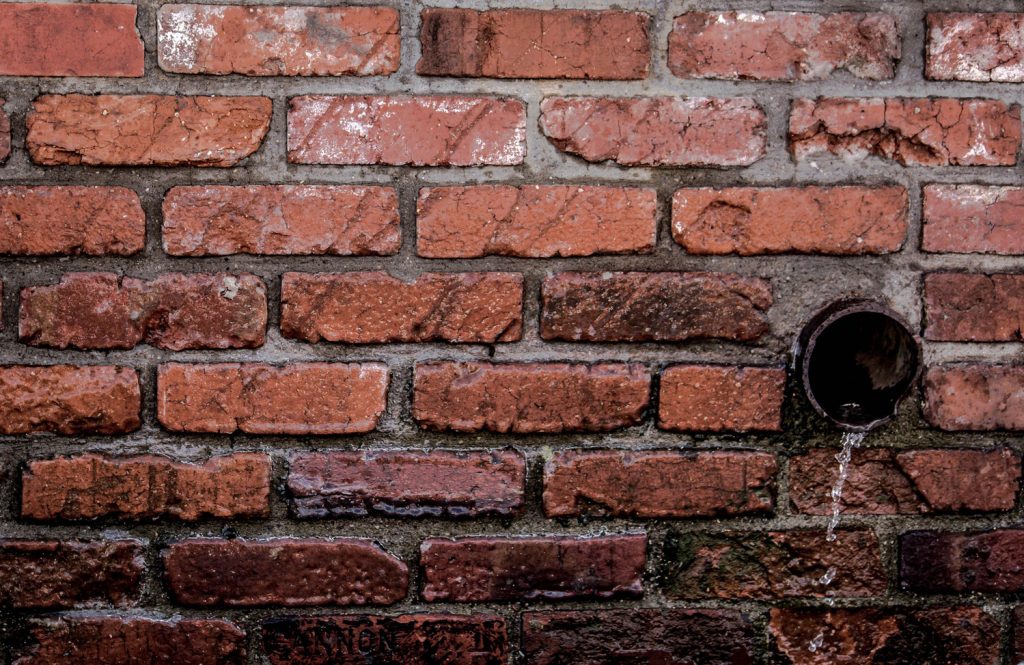
In the photograph of a brick wall above by Jonathan Aman, I removed the dripping pipe in the lower right-hand corner of the frame very easily by first selecting the pipe and then moving this selection with the Patch tool. The trick in this instance was to try and line all the brickwork up. After a few goes, I managed to get something that I think looks rather convincing.
3. Clone Stamp Tool
By far the oldest tool in this list, the Clone Stamp tool is still a useful way to edit unwanted things out of your photographs. Just like the Patch tool, you specify the area of the image which you want Photoshop to reference from. If you want complete control when it comes to Photoshopping something out, then the Clone Stamp is the tool for you. The downside of this very manual tool is that it can take much longer to achieve the desired effect, but if accuracy is what you are after, then the time and effort required are worth it.
4. Spot Healing Brush


The Spot Healing brush is another favorite tool of mine for removing objects. In many ways, it is like the Content Aware tool but in brush form. Spots, blemishes, and marks can all be erased with the click of a mouse. Those who thought this tool was exclusively just for spots should think again. By clicking and dragging this brush, you can draw around any shape object you need to remove. I quite often draw straight lines with this tool when I quickly want to remove things like creases out of clothes or unsightly power lines in landscape shots.
5. Using a Donor Image

This technique is the most extreme object removal method in the list, but in many ways is the most effective. If you have additional shots taken at the same time as your problematic image, you can quite easily graft in parts from another picture to remove the unwanted items in your shot. Using a donor image is such a useful technique that I wrote a whole article on the importance of shooting spare shots.
6. Direct Painting


Even though I’m not a huge fan of this technique, many retouchers use the brush tool to paint directly onto their images to remove unwanted objects. If none of the other methods mentioned above have worked for you, then give this a try. By using the eyedropper tool, you can select the exact color you need to paint, with which should help you to create a convincing edit. I would also suggest adding some noise to any paintbrush work you do to help mimic the digital file you are working on.
So there you have it, six different ways to edit things out of your work using Photoshop. The techniques mentioned above are in the order I usually approach the job of removing objects from my images. If one particular method doesn’t work for me, I move onto the next one to see if I can get any better results. It’s also worth noting that all these approaches to editing don’t need to be used in isolation either. Sometimes, you may find one tool does most of the heavy lifting but needs a little help from another tool to finish things off. By knowing several different editing techniques, you stand a much better chance of convincingly removing unwanted objects in your pictures.
Do you use any of these removal techniques yourself? Any methods I missed on the list? I’d love to hear from you in the comments below.
This article is written by Paul Adshead and appeared here.
All the images are collected from here.