Today’s smartphone photography is good enough to put the cameras of yesteryear to shame. Photos today are more clear and colorful than ever, and social media makes them easier to share with friends and family no matter where they live.
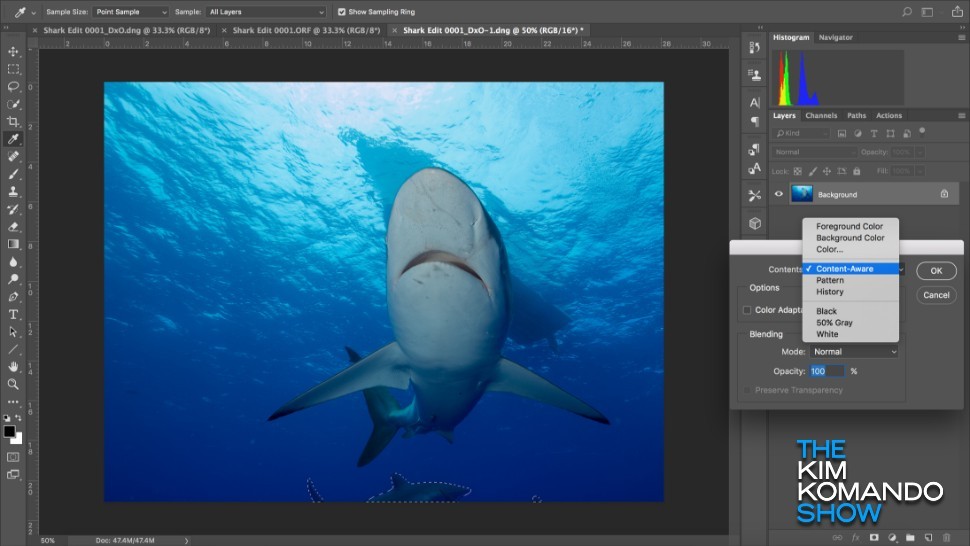
That said, not everyone knows about editing their photos once they’re saved. Anyone can be a photographer, but editing, cropping and adjusting a photo’s color can make all the difference between a masterpiece and an amateur shot. Click or tap to learn more about our recommended free photo editing tool.
If you love taking pictures but don’t know the first thing about touching them up, these six easy tricks can help you bring out the best in your photos. You won’t believe just how much your smartphone camera is capable of.
1. Cropping 101
Cropping is an easy way to direct the eye toward your photo’s subject. Too many unnecessary background details can be distracting, so cropping out the non-essentials can add vibrancy to any picture.
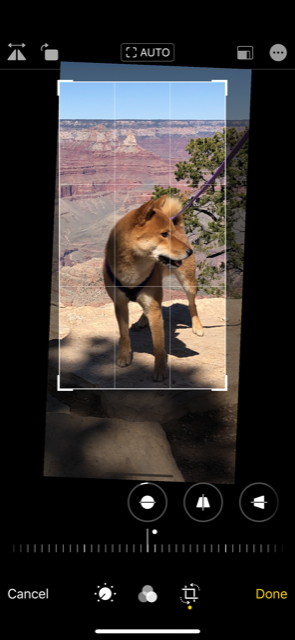
Nearly every photo-editing app offers a cropping feature of some sort. To find it, look for the icon that looks like two interlocking squares. Once you select it, you’ll be able to drag a box around the areas of your photo you want to keep. Once you tap or click “crop,” anything outside the box will be removed, so make sure to save your photo before continuing.
2. Flesh out details
Contrast refers to the scale of difference between black and white in your image. Even if your image is in color, your camera will still pick up bright highlights and dark shadows. Adjusting the contrast will enhance the difference between these extremes and can help bring out details you wouldn’t see otherwise.
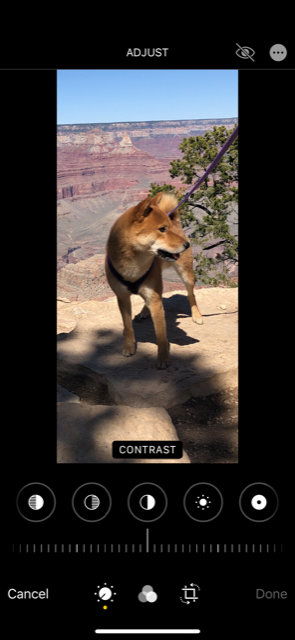
As an example, we’ll show you how to adjust the contrast using the iPhone’s default photo app. Open the photo you want to edit, tap the picture to bring up the surrounding window, and tap Edit in the upper right corner of the screen.
Select the dial icon (which you may or may not have to do, depending on your previous editing activity) and swipe through the options that begin with “AUTO” until you see an icon shaped like a solid black and white circle. Scroll the bar beneath the icon right or left to adjust the contrast.
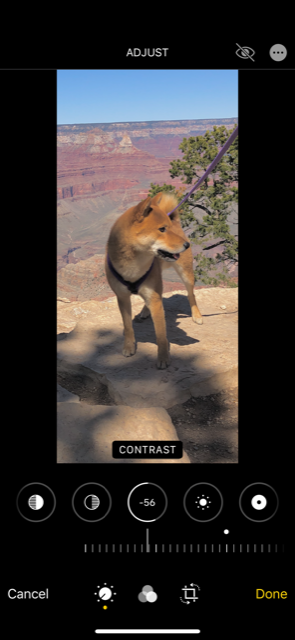
As you can see, decreasing the contrast will brighten the image and bring out the colors. Increasing it will bring out shadows and details.
Contrast adjustment is available in most photo editing apps. It will typically look like a shape with one half white and the other black, but the design may vary depending on the program.
3. It’s all about exposure
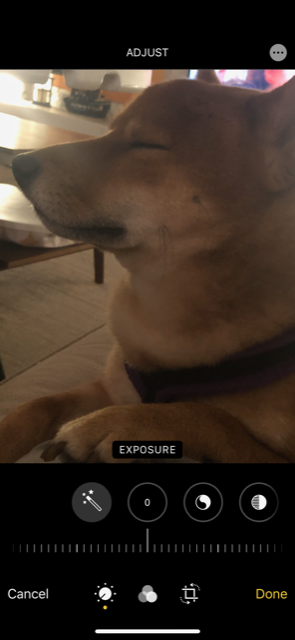
Exposure refers to the amount of light the camera lens allows in. In digital photography, you can adjust the exposure after you’ve taken the picture. This can help brighten a photo that turned out too dark.
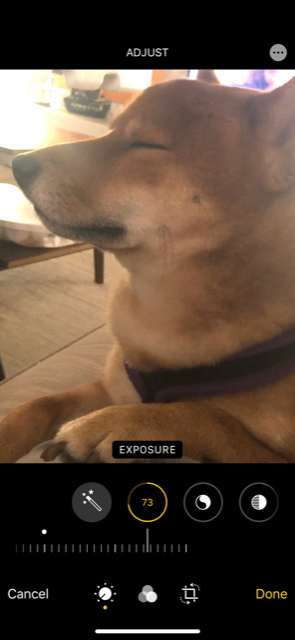
Not every app has the same icon for adjusting exposure, but it will usually be labeled “Exposure.” Use your best judgment with this feature, as too much can wash out your picture.
4. Bring out the best in your subjects
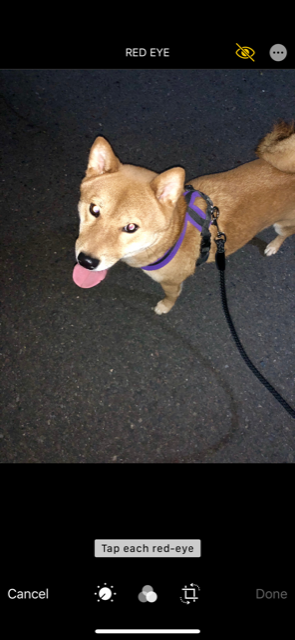
Even the best pictures can sometimes fall victim to red-eye. This happens when the flash of a camera reflects off the eyes of a subject, resulting in an eerie red glow. Fortunately, most photo editing apps feature tools that can remove it. Just look for an icon that looks like an eye. Sometimes, like on the iPhone, this icon will have a line through it.
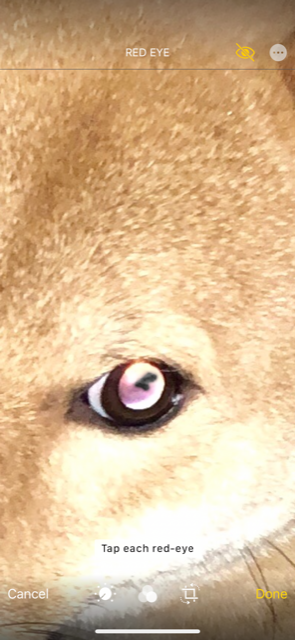
With the tool enabled, tap on the eye of your subject to remove the red eye. You might need to do this multiple times to clear out the entire red area.
5. Hot or cold?
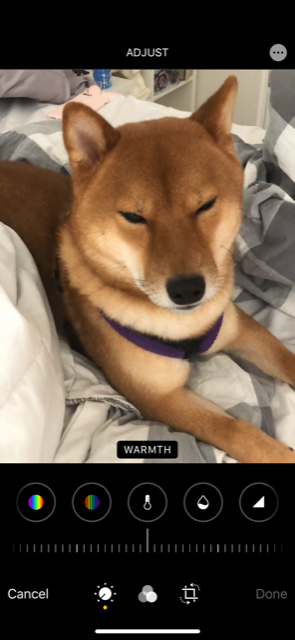
Even if the subject and lighting are ideal, you may want to convey a different mood with your photo. You can alter this easily by changing the color temperature of your image. On some devices and programs, this is referred to as warmth, but the icon symbol will look like a thermometer on most applications.
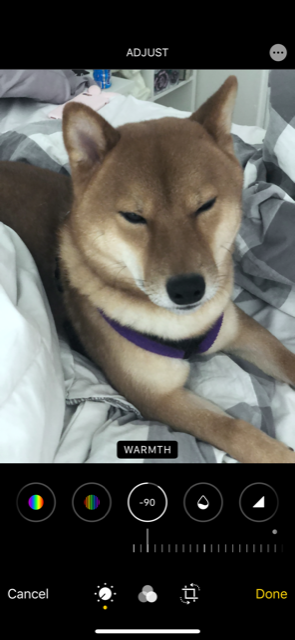
Going for cooler temperatures can make a picture more somber or moody. Warmer temperatures can make a photo look more exciting and urgent. What you choose should fit the message your photo is trying to convey.
6. Filter fun!
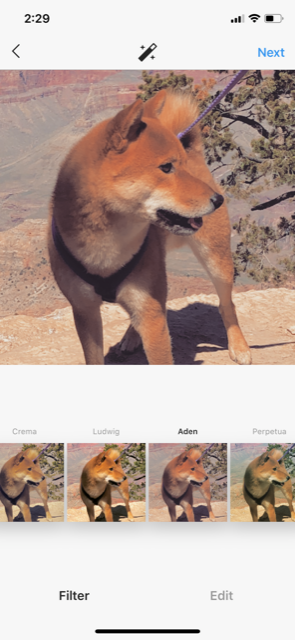
Of course, we couldn’t discuss photo editing in the digital age without bringing up photo filters. In fact, photo filters automatically do much of the work we mentioned above — but adding a filter to a photo you already edited can make it look even more dramatic.
Instagram and Facebook both feature photo filters, and they’re a great way to keep your content fresh and interesting. Just make sure your privacy settings are to your liking before sharing your masterpieces with the world. Click or tap to learn an easy way to change your Instagram privacy settings.
Looking for more photography tips and examples of pro-quality shots? Click or tap here to visit Dreamstime for inspiration and pro photography advice.
This article is written by James Gelinas and appeared here.
All the images are collected from here.