You might already be familiar with the quick fixes you can apply to your pictures after you’ve snapped them, right on your phone—but if you want to take your mobile photo editing to the next level there are tools and apps that can help here too. Here are six advanced tricks to try and how to apply them.
Keep in mind that while the tools below can do some neat tricks, they’ll never be a full substitute for the precision editing you can do with a mouse, drawing tablet or Photoshop. That said, you’ll be surprised at what you can pull off with a little practice.
1) Combine photos together in layers

Combining photos as several layers in one picture is one of the most common tricks you can do with an image editor, but you don’t have to wait until you get to a computer and fire up Photoshop to do it—you can use Adobe Photoshop Mix for Android and iOS instead.
Once you’re into the app, and have opened up a picture, tap the Plus icon on the right, then Image to add a new layer to your project (another image on top of your existing one). Pinch and drag the second image to position it, then tap the Cut Out button—select Smart and Add to paint over the areas of the image you want to keep.
Tap the Check button (lower right) to complete the effect and your second image should now be neatly cut out on top of your first one, and you can add extra layers if you want to. With the Cut Out tool on screen, select Refine then Feather to make the blend between the layers smoother—tap and drag up on the Feather button.
2) Cut out objects from photos
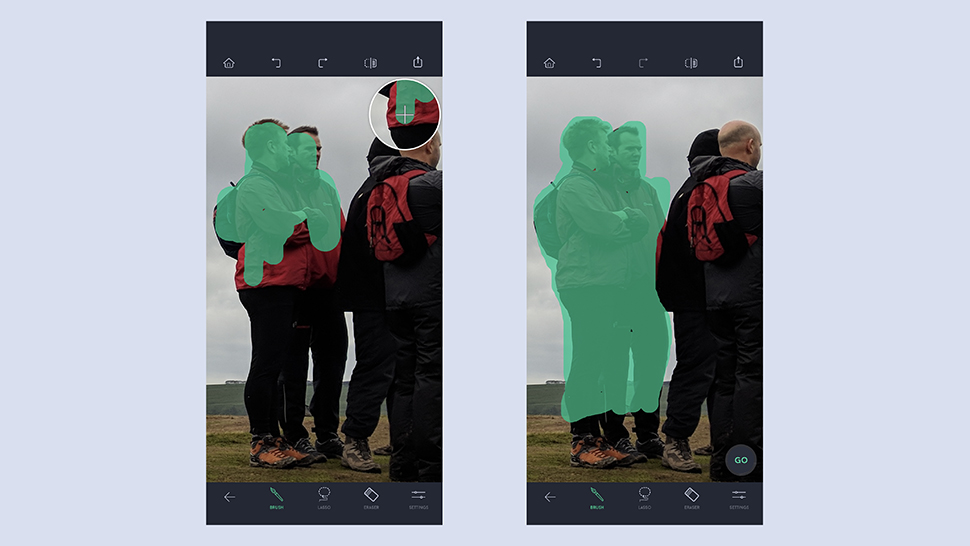
Another pro-level trick you’ll see the experts do on a computer is removing objects from photos and blending in the background behind—it’s as if the original object or person was never there. This is another trick you can do on mobile, with our recommended tool of choice TouchRetouch for Android and iOS ($2).
With your picture of choice loaded into the app, tap Object Removal then the Brush tool. Tap Settings to set the size of your brush, then pinch and zoom to get as close to the pixels you want to remove as you can while still being able to see the bigger picture. Paint over the areas you want to wipe out, then tap Go.
The app attempts to use surrounding areas of background to make the removal as seamless as possible, but if little bits are left behind you can repeat the process again. Alternatively, use the Lasso tool instead of Brush to get a more accurate cut around your unwanted object (as you set the boundaries of the object with your finger, you’ll see a zoomed-in preview on screen).
3) Adjust the background focus
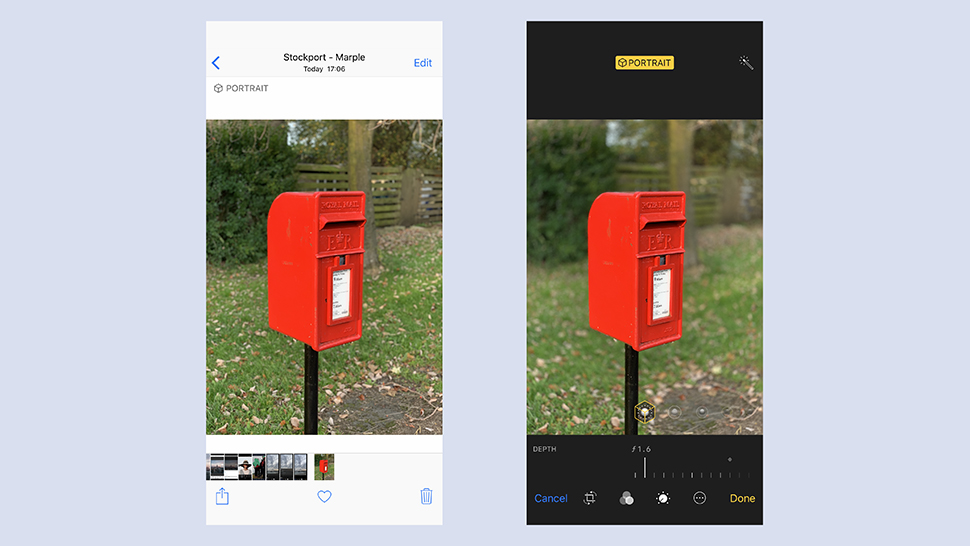
The smartest phone cameras on the market can now adjust the depth of field (essentially the background focus behind an object), even after you’ve taken the photo. On the iPhone XS, iPhone XS Max, and iPhone XR, tap on a photo taken in Portrait mode, then choose Edit—use the slider at the bottom of the screen to change the strength of the focus.
The same sort of functionality is coming soon to Google Photos, so you can’t do this quite yet on your Android handset, though the Pixel phones will apply a bokeh effect as you take a picture in Portrait mode. Google did demo a post-processing depth of field slider at its October hardware event, so we’re guessing the functionality can’t be far off—but it’s not available at the time of writing.
To tide you over until the feature arrives, the best option we know of on Android is Photo Blur—at least when it comes to adjusting the depth of field effect after a photo has been taken. You do need to do some manual work to get the best results though, highlighting the areas you’d like to sharpen up with your finger once a picture is loaded.
4) Remove color casts
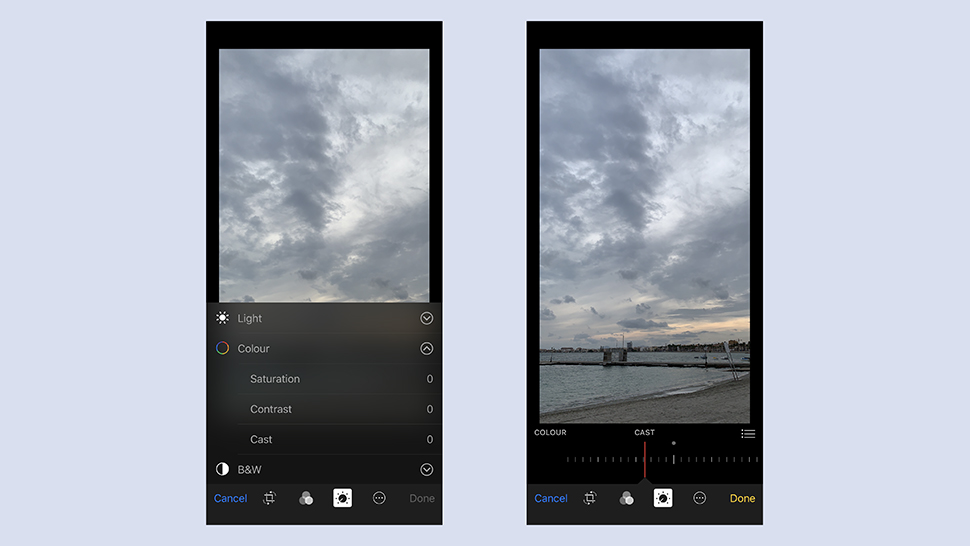
One of the more common problems you’re likely to come across when snapping photos on the go is the wrong color cast—images with an unnatural sheen to them because you’ve taken them in less than ideal light.
This is something else you can do in the photo app that comes with your phone. In Photos for iOS, get a picture up on screen then tap the Edit button. Tap the Adjust button (a dial icon), then tap the arrow beside Color, then select Cast—as you move your finger to the left on the slider you can make an image cooler, and as you move your finger to the right you can make it warmer.
Google Photos for Android (and indeed for iOS) can do a similar sort of trick. With a photo on screen, tap the Edit button (a sliders icon), then if you’re feeling brave just hit Auto to have the app work its magic automatically. To take more control over the effect, tap the sliders icon again, then Color, to bring up adjustment sliders for saturation, warmth, tint, and skin tone.
5) Brighten up shadows
It’s tricky to get the lighting right on photos some of the time, even with on board phone AI trying to do some of the heavy lifting for you. If you want to only brighten the darkest areas of a photo, without washing out the rest of the image, Snapseed for Android and iOS is one of the tools that can help.
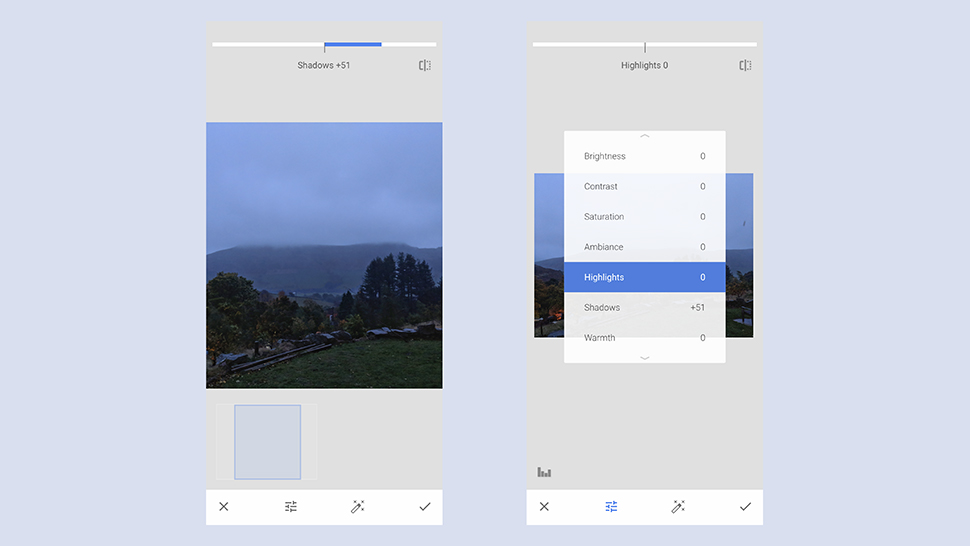
With a picture open on screen, tap the Tools tab then choose Tune Image. If you then tap the sliders icon at the bottom, you’ll see the usual brightness and contrast options are listed alongside Highlights (useful for darkening bright areas) and Shadows (useful for brightening dark areas).
Pick either option then use the slider up at the top of the screen to adjust the values up or down: Your changes will be previewed straight away in the thumbnail underneath. Pinch and zoom to get a better look, or use the auto-adjust button (the magic wand) down at the bottom to apply the fixes Snapseed thinks your picture needs.
6) Smooth imperfections and blemishes
If you want to smooth over imperfections and blemishes on your photos, again there are a range of tools that can help. In this case, we’ll pick Pixlr for Android and iOS for its ease of use and its cross-platform availability, but other editors out there can do this too.
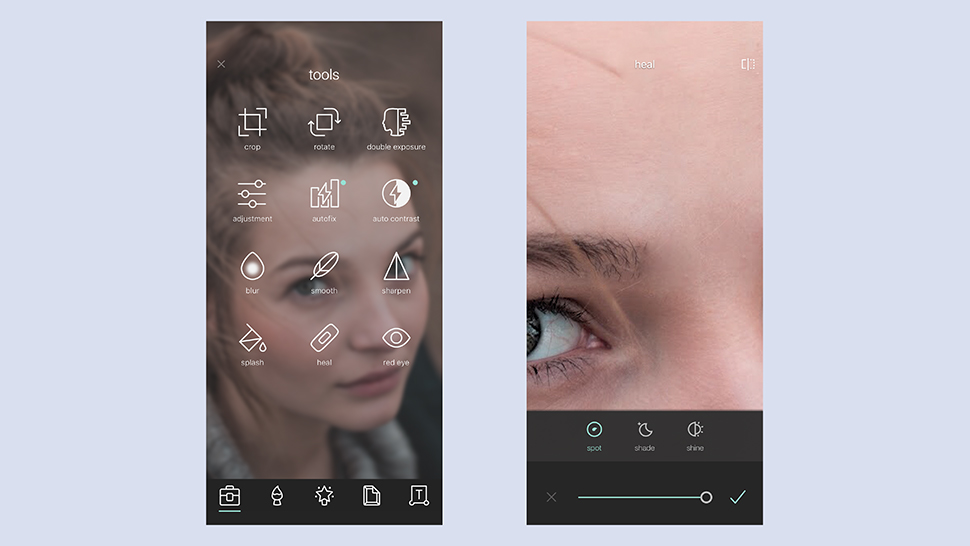
Load up an image in the app, tap the Toolbox icon (bottom left), then choose the Heal brush from the list of options that appear. Choose Spot to get rid of small imperfections that you don’t want, adjusting the slider down at the bottom of the screen to alter the size of the brush you’re using.
Tap once on any blemish that appears on the image and Pixlr will use the information in the surrounding pixels to paint over it—the more time you take over this the better the end result will be. Note the Shade and Shine tools, for darkening and lightening spots on the image respectively (again you can adjust the brush size if needed).
7) Fix image distortion
If your photos need any kind of lens distortion fixing or perspective correction, then SKRWT for Android and iOS ($2) is the app for you—like all the best professional image editing apps, it gets some fantastic results with very little effort needed on your part.
You first need to load in an image from your library, then simply select one of the many tools along the bottom and start sliding along the ruler: Horizontal or vertical perspective correction, for instance, or the rotation tool. As well as the more advanced options you’ve got basic tools for cropping pictures and straightening them out.
The lens distortion fixer is one of the most effective features and can come in handy if you’ve been taking images with a lens adapter or on a GoPro. You can pick from Mobile, Wide, Fisheye, and GoPro distortion, then adjust the slider underneath.
8) Pixelate parts of an image
Need to protect your privacy (or the privacy of someone else) by pixelating part of an image? Maybe you want to block out your embarrassing DVD collection or don’t want photos of the kids appearing on social media. Plenty of apps can do the job swiftly and easily, but one of the ones we like the most is Fotor for Android and iOS.
Part of the appeal is the way you can focus in on a particular part of an image to blur out, with the minimum of fuss. With a picture loaded inside the app, scroll all the way to the right on the bottom toolbar, then choose Pixelate.
Tap Brush, then set the size and the strength of the effect, and start painting over the parts of the image you’d like to wipe from view. It’s very neat, and you can switch to the Eraser tool to undo changes on specific parts of the image (if you want to bring something that’s been pixelated back into view).Hope you have enjoyed the article.
Beside these to work with any higher end work by using Photoshop at a competitive price you can now contact us here.
All the images are collected from here.
This post is originally written by David Nield and appeared in here.