
If you’re like me and primarily use Lightroom Classic for your photo editing, you probably occasionally edit a photo in Photoshop. If you do, you might be making the same Photoshop file mistakes I made.
The typical workflow, in this case, is that you right-click on a photo in Lightroom, select “Edit In,” and then choose one of the following from the context menu:
- Edit in Adobe Photoshop CC 2019
- Open as Smart Object in Photoshop
- Merge to Panorama in Photoshop
- Merge to HDR Pro in Photoshop
Selecting one of these opens the photo(s) in Photoshop. You then do whatever it is that you need to do and then either close the image or exit Photoshop. Photoshop asks you if you want to save the image, which you confirm, and you’re back in Lightroom with your Photoshop edited photo next to your previous photo(s). The file format Photoshop uses to save the image is determined by your Lightroom settings (more on that below).
If you make the same mistakes I did, you end up with a giant TIFF file — a gigabyte TIFF file.
Mistake 1: Not Merging Layers
I’ve done this several times. If your settings in Lightroom are to save Photoshop edits as TIFF files, before you exit Photoshop, you should flatten your image by going to the Layer menu and selecting Flatten Image. This step is especially important when you have sent multiple photos to Photoshop as layers, such as when doing a focus stack, panorama, or HDR merge. The TIFF file format supports layers, so if you don’t flatten the image, you’ll end up with a huge file.
This step can be a personal preference depending upon whether or not you intend to edit this file again later in Photoshop.
Mistake 2: TIFF Compression
I’m not sure what the default compression setting is for TIFF files in the “Edit in Adobe Photoshop CC 2019” preference in Lightroom, but I often choose “Save As” in Photoshop and specify the filename manually, such as “20191010_029_Pano.tif,” “20191010_029_Stack.tif,” or “20191010_029_Edit.tif.” This technique also allows me to choose the compression for the TIFF file, but this is where I previously made the mistake of choosing LZW compression.
When using Save As during the save process, Photoshop allows you to choose one of the following compression options: None, LZW, Zip, and JPEG. My mistake was selecting LZW. The LZW compression algorithm was designed for 8-bit images and results in 16-bit images having a larger file size (yes, like 20-30% larger), which explains why the setting in Lightroom only allows for the specification of None or Zip compression. The larger size for LZW isn’t a bug, it’s just the way the LZW algorithm works.
I would not suggest using JPEG compression, because it is a lossy form of compression and will result in the loss of detail in the image, which is primarily why you’re using TIFF to begin with, to preserve image quality.
The use of 8-bit would decrease the number of colors in the image, so you would only want to use that if your final image requires it. If you’re not sure, stick with 16-bit, or you’re likely to see artifacts and banding in your image.
It’s worthy to note that LZW and Zip compression is lossless, so there’s no need to worry about image quality. Zip compression results in the smallest file size, but can take longer to save.

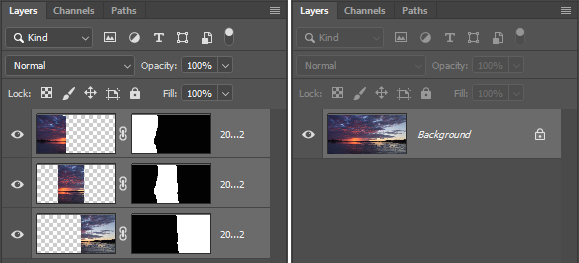
Mistake 3: Crop Extra Layer Image Area
If you’re doing a sky replacement or working with multiple images as layers, you may have additional image data outside of the image canvas that can contribute to a larger file size. Unless you want to save this image information for later, select all of the layer and then crop it.
Again, this will only be applicable if you’re not worried about preserving the layers for future changes.
Mistake 4: Assuming You Have to Use the Default File Format
The “Edit in Adobe Photoshop CC 2019” preferences in Lightroom under the “External Editing” tab are just the default settings that Photoshop uses if you close the image and choose to save it. Photoshop doesn’t prompt you to select a file format or options; Photoshop saves it with those options and returns the image to Lightroom.
Here’s a tip: You can override that setting from Photoshop. You can save to whatever format Lightroom supports (JPG, TIFF, PNG, PSD) by simply choosing Save As from the File menu and then exiting Photoshop or closing the image. You can even use the Save As command in Photoshop to save the image multiple times in different formats (like PSD, PNG, or TIFF) and/or with different file names, and each time you do, the image is automatically imported back into Lightroom alongside the original photo (If you have the “Stack With Original” option checked).

Maybe you have an image that you want to try multiple sky replacements on. You could choose to save the image as a PSD file and then edit a copy later for a different sky. There are quite a few different scenarios where you might want to use a different file format than the original.
Conclusion
If you’re trying to save disk space, you may want to use these tips when editing your photos in Photoshop from Lightroom. Personally, most of my Photoshop edits from Lightroom are what I consider permanent. What I mean by that is that I don’t intend to go back and change anything. Most of the time, my changes are so small that if I wanted to redo something, I would just redo it from the original raw file(s).
This article is written by Mike Dixon and appeared here.
All the images are collected from here.