More than often you may want to resize your image. Resizing image without losing quality of the image in Photoshop is relatively simple and straightforward. Although having said that there are some key aspects that you should have a basic understanding of in order to ensure the quality of your results. Image size is located in the main navigational menu underneath image- image size.
![]()
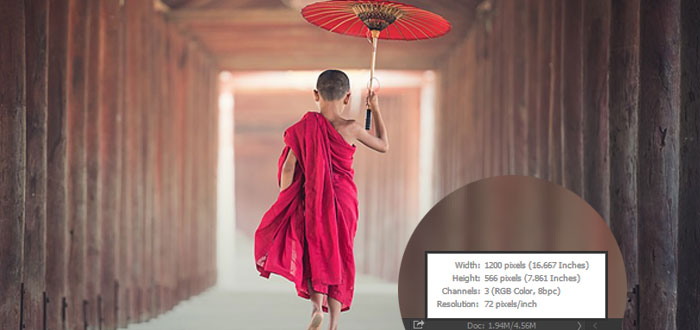
When you first open up the image size window you’ll be presented with the pixel dimension of your image along with the actual file size. The file size or the Pixel Dimensions for the selected image is 676.8k (the value is for example purpose). We also have the width and the height of the image specified in Pixels. The pixels can be change into percent. Now it’s worth noting if you want to resize your images for the web than you need to do it in pixels.
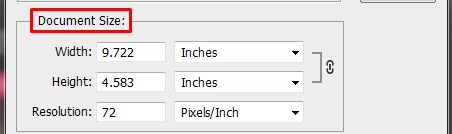
Below that there is the Document Size now this will give you the exact dimensions of your image and note Resolution is also here. You can select the measurement unit to your preference, currently the unit is in Inches. Inches can be change to centimeter or millimeter. It is interesting to keep an eye on the change in number. Let’s say you want the image size to be 50cm in width this will have effect on the entire photo. The document size and the pixel size will change simultaneously and the file size will change as well. Earlier the file size was too small now the size will increase in number. Moving forward below the dimension size we have the resolution and that’s defaulted to Pixels per Inch. If you are intending to print then the least resolution would be 254 pixels. This is the standard metric size for most photographers.
Beside under the Document Size and Pixel Dimensions in both width and height you’ll notice the bracket with a link icon beside it. The actual Constrain Proportions checkbox which is down the bottom is checked. This indicates that they are actually constrained proportions. Now this simply means that the proportion of the image can’t be distorted. If we uncheck the box then you’ll notice that the little bracket and link icon will disappear but this will create a problem. Once you change the width or height while keeping the box unchecked this will produce a distorted image.
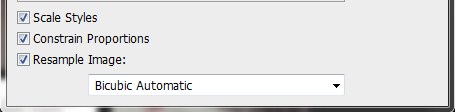
Now above Constrain Proportions we have Scale Styles. Always keep this checked because when enable, any effects that you may have on your image in relation to your resizing it’s going to scale proportionately.
Underneath that we have the Resample Image. Perhaps the most important area within the image size is Resample Image. This determines the type of interpolation that’s used for your resizing a photo. The interpolation algorithm takes care of the pixels as long as the size changes are not extreme.
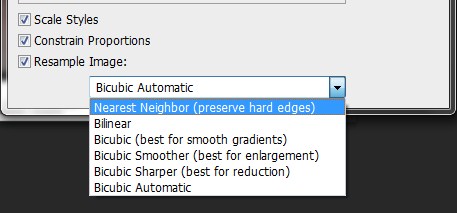
As you can see there are five options available to you to utilize. The first being Nearest Neighbor methods is fast but it’s less precise than any of the other methods with regards to replicating pixels in an image. It’s better not to use this option.
Underneath Nearest Neighbor we have Bilinear. This is the method that adds pixels by averaging the color of the surrounding pixels. It produces sort of a medium quality results. However this is also not the method to follow.
Three methods or three interpolations methods you should stick with are Bicubic, Bicubic Smoother and Bicubic Sharper.
Bicubic is slower than Nearest Neighbor or Bilinear but because of this it is more precise methods of examining the values of surrounding pixels. It uses more complex calculations in order to achieve smoother tonal graduations. So this is an important detail when it comes to resizing your image. Bicubic Smoother and Bicubic Sharper are other variations of Bicubic.
Bicubic Smoother is a good method for enlarging image, note it says best for enlargements, based on the original Bicubic interpolation. It’s been designed to produce smoother results. This is the option you should select when enlarging your image.
Bicubic Sharper is a good method for reducing the size of your images by adding a little bit of sharpening so this method maintains a little bit of more detailed in the resample image.
To sum it up in few words, the general rule of thumb for reducing size would be Bicubic Sharper and for enlarging any image Bicubic Smoother would be selected. However, depending on the image, Bicubic Sharper gives good result with both reducing and enlarging the image.
Let’s follow the steps to resize your images without losing their quality:
Step by step image resizing

1 Open a photo that you want to enlarge.
A The current size of the image as shown on-screen appears here.
2 Click Image.
3 Click Image Size.

The Image Size dialog box appears, showing the current size of the opened image.
4 Make sure that the Resample Image check box is selected.
5 Double-click in the Document Size Width box to highlight the contents.

6 Type the width that you want for the final printed image.
B The height automatically adjusts proportionally.
7 Click the drop-down menu and select Bicubic Sharper (best for reduction).
8 Click OK.
A progress bar may appear depending on the speed of the computer’s processor and the size of the image as Photoshop processes the enlargement.
The enlarged photo appears.
Click at the place shown on the photo to check the file size in the window frame.
Test It!
Make two copies of an image. Enlarge the first using Bicubic Smoother and the second using Bicubic Sharper. Place them both side by side for comparison.
Related Articles: