How to use a couple of traditional photo editing tools to adjust and perfect the light in your images.
The terms ‘dodging’ and ‘burning’ take us back to the chemical darkroom days when special tools were used to lighten or darken discrete areas of a photo by increasing or limiting the exposure while exposing a print. These tools are simulated by brushes in today’s image editors.
In an image editor like Photoshop (which is used for the illustrations in this feature), the Dodge tool is used to lighten an area, while the Burn tool is for darkening. Photoshop’s tools cover three tonal areas: Shadows, Midtones and Highlights.
The beauty of these tools is that they only affect the range of tones selected. So if you select the Shadows range with the Dodge tool, even though you can ‘paint’ the brush over areas containing highlights, midtones and shadows, only the shadows will be lightened.
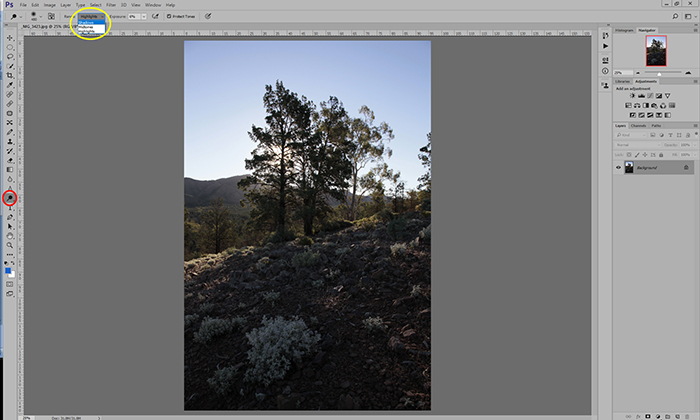
The Dodge and Burn tools are located in the Toolbox on the left side of the Photoshop workspace and circled in red on the screen grab on this page. Clicking on the Range dropdown menu in the Menu bar (circled in yellow in the illustration on this page) allows you to select which tones will be affected.
The terms ‘dodging’ and ‘burning’ take us back to the chemical darkroom days when special tools were used to lighten or darken discrete areas of a photo by increasing or limiting the exposure while exposing a print. These tools are simulated by brushes in today’s image editors.
In an image editor like Photoshop (which is used for the illustrations in this feature), the Dodge tool is used to lighten an area, while the Burn tool is for darkening. Photoshop’s tools cover three tonal areas: Shadows, Midtones and Highlights.
The beauty of these tools is that they only affect the range of tones selected. So if you select the Shadows range with the Dodge tool, even though you can ‘paint’ the brush over areas containing highlights, midtones and shadows, only the shadows will be lightened.
The Dodge and Burn tools are located in the Toolbox on the left side of the Photoshop workspace and circled in red on the screen grab on this page. Clicking on the Range dropdown menu in the Menu bar (circled in yellow in the illustration on this page) allows you to select which tones will be affected.
Duplicate layer
We’ll start by demonstrating the use of these tools on a JPEG image. The first step is to create a duplicate layer (Layer > Duplicate Layer) as an ‘insurance’ against unintended errors. Working on a duplicate layer preserves the original image; it’s easy to delete the layer if you make a mistake that can’t be corrected.
This is less necessary with Photoshop, which supports multiple levels of Undo and also when you start with a raw file, which provides more scope for adjustments and can be saved in TIFF format to preserve its integrity.
However, if you save your work part way through an edit, you won’t be able to step back through the adjustments you made before the save. Provided you haven’t closed the image, you should be able to restore the original image by selecting File in the Menu bar and Revert from the dropdown menu. But, remember, each time you re-save a JPEG, image data is lost.
Working with a JPEG image
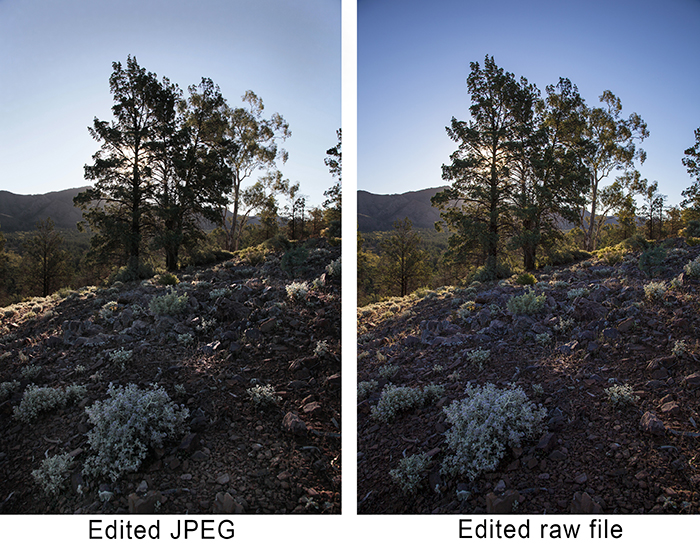
In the image shown in the workspace above, the light is unevenly balanced. The tree and the foreground are too dark but the sky is too light. We want to lighten the foreground and darken the sky.
Select the Dodge tool from the Toolbox and set the brush size and hardness according to the directions in the Brush and Exposure Adjustments section below. Then choose the tonal band you want to work on and set the Exposure level. We’ve chosen a brush that is 400 pixels in diameter with maximum softness and set the Range to Highlights and Exposure to 10%.
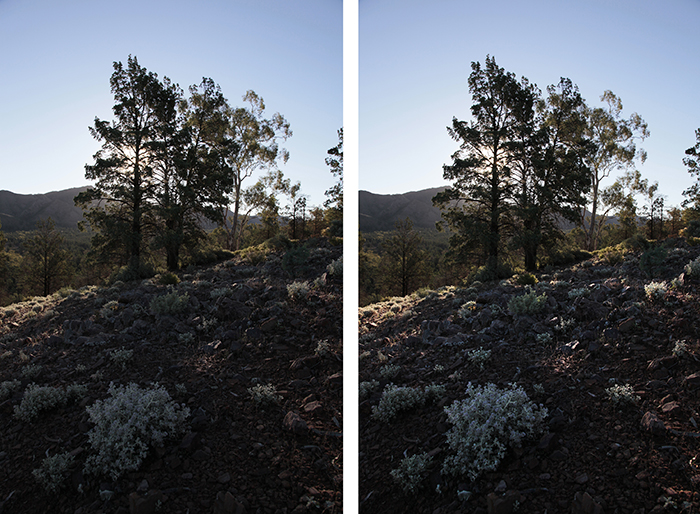
Lightening the highlights hasn’t quite achieved the results we wanted so we’ll swap to the Midtones range, leaving the brush size and Exposure unchanged.
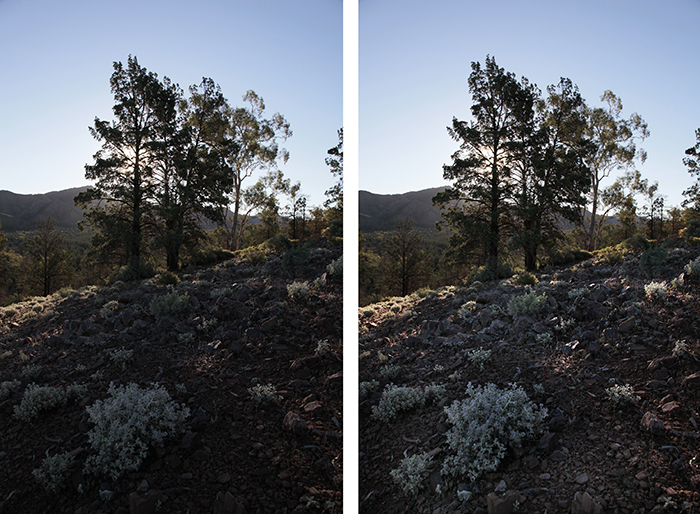
The final band to address is the Shadows, and here a careful hand will be required. Once again, we’ve left the brush size and Exposure unchanged.
We will now turn to the over-bright sky and try to darken it with the Burn tool. This tool requires a degree of caution, particularly if you use it to darken very light-toned areas. Where there is little or no colour information to sample, the tool will use neutral density (grey) to produce the darkening. This often produces unattractive results.
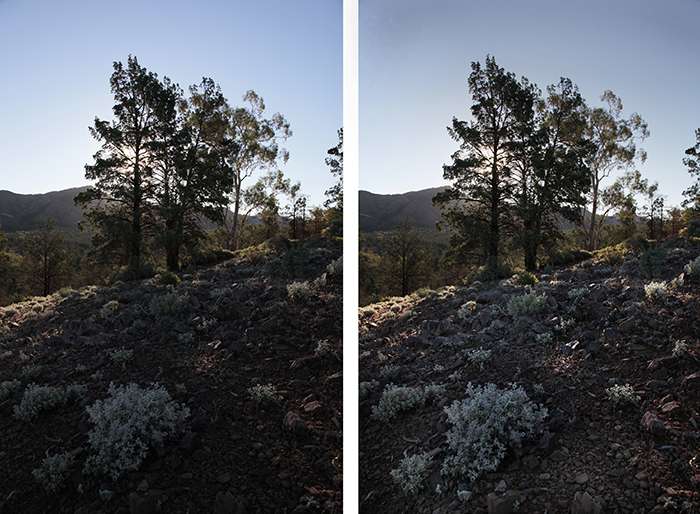
Once again we have left the brush size unchanged. But with the Burn tool selected, we’ve reduced the Exposure to 6% and selected the Highlights range.

Brush and Exposure Adjustments
The size and hardness of the brush are set via the Brushes dropdown menu just left of the Range and Exposure settings for the dodging or burning tool. Larger, softer brushes spread the dodging and burning effect over a larger area, making blending with the surrounding area easier.
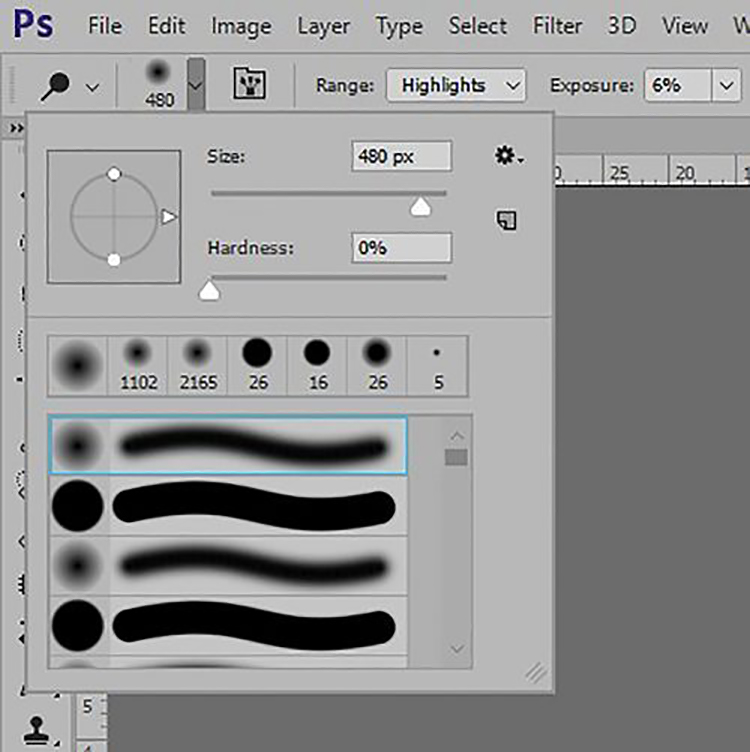
The Exposure level is controlled with the dropdown slider just to the right of the Range dropdown menu in the Menu bar. Using a low Exposure value is recommended because it gives you finer control of the degree of lightening or darkening. High exposure values work too quickly and produce unnatural-looking, obviously dodged or burned areas.
We recommend you start with an Exposure value below 10%. Remember, each time you pass the brush over an area, it will be lightened or darkened by the degree you’ve specified. If your first pass wasn’t enough, subsequent passes should build up to the level of lightening or darkening you want.
Working with a raw file
You have much more scope for getting image tones right when working with raw files because their greater bit depth means they contain much more information. This means you can make more substantial adjustments before the picture starts to look ‘manipulated’. And adjustments are easier to make.
For this demonstration we’ve used Adobe Camera Raw, the raw file converter embedded in Photoshop and Photoshop Elements (Photoshop users get a wider range of adjustments). Most other third-party converters will provide similar adjustments. Start by opening the raw file in the conversion software and select the Auto adjustment.
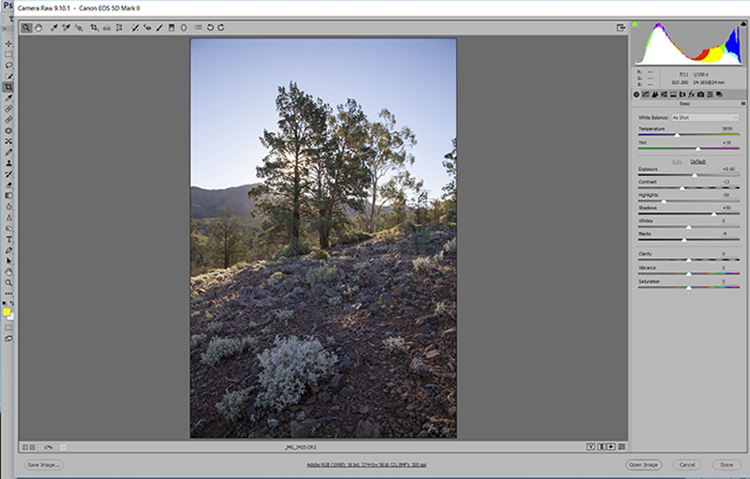
We think the Exposure adjustment applied by the Auto setting is excessive. So the first step is to reduce this over-exposure to -0.40 points, which gives a good tonal distribution, although the foreground is a little flat.
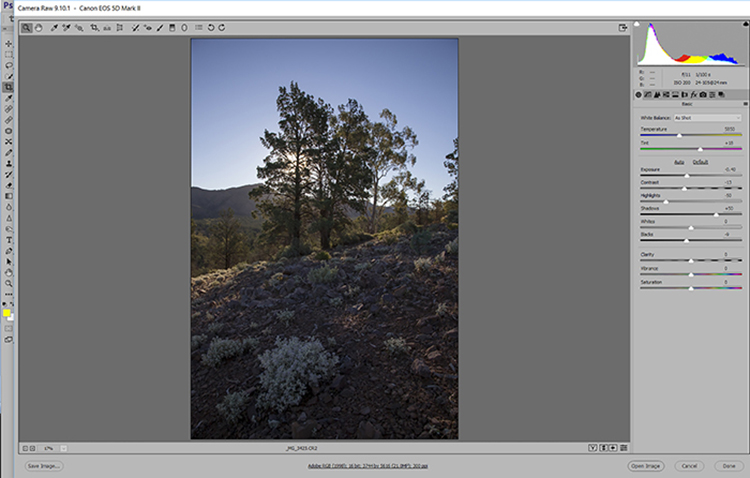
The sky has been nicely darkened and you can see the effect of the lens vignetting in the darkened corners. This is actually beneficial since it directs the viewer’s attention towards the centre of the frame.
Tweaking the Highlights slider to the left a little further darkens the sky, while moving the Shadows slider a little to the right opens up the foreground areas a little. The image could do with a little more contrast, so we’ve moved that slider to the right to the +6 point.
Before converting the file, it pays to adjust the Clarity, Vibrance and Saturation sliders. The Clarity slider adds midtone contrast to the image, giving it a sharper appearance, although it doesn’t actually add sharpening. The Vibrance adjustment makes the dull colours in the image more vibrant, while the Saturation adjustment increases the intensity of every colour in the image by the same amount. It should be used conservatively.

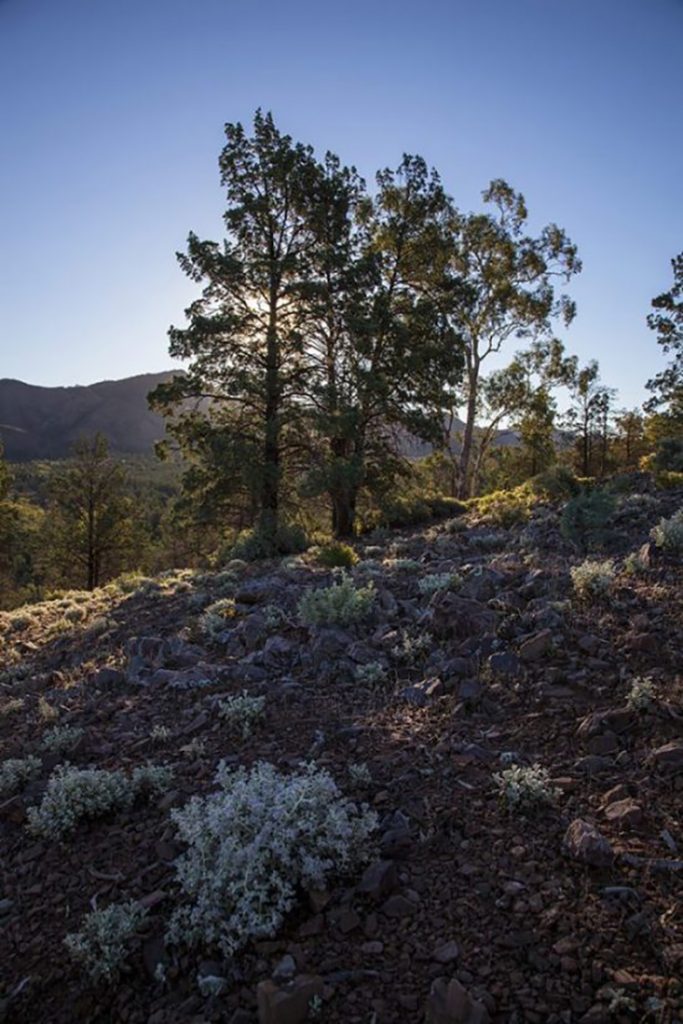
Once you have transferred the image to Photoshop, you can use the Dodge and Burn tools again. But this time you will only require the Dodge tool and much finer adjustments will be needed. You also have the advantage of working with a 16-bit file, which gives you more scope for adjustment than an 8-bit JPEG.
So, we’ll start again with Highlight adjustments, but this time with the Exposure set at 5%. A few passes across the saltbush in the foreground and the sunlit clumps of grass is enough to
‘lift’ their tones nicely. Similar passes with the Midtone brush at 5%, brightens up the rocks and red earth on the hillside and give a slight lift to the silhouetted tones in the tree branches.
There’s probably no need for shadow adjustments since the raw file converter has done a fine job of bringing out details in shadowed areas.
Article by Margaret Brown – see Margaret’s photography pocket guides
All the images are collected from here.