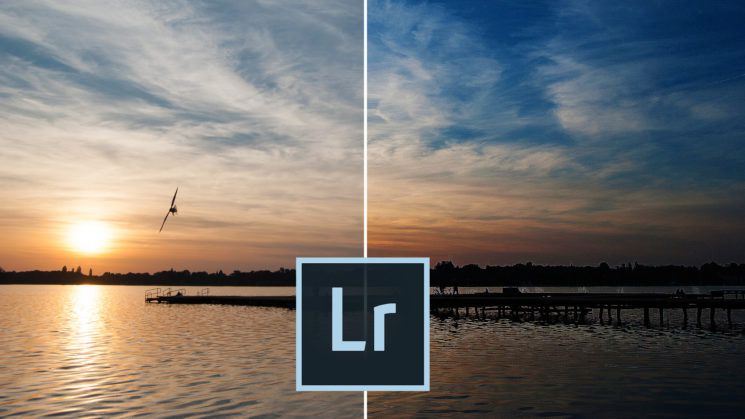
When editing your photos, one of the important things to know is when to stop. But while you know that too much editing will ruin your images rather than enhance them, the question remains: when do you know that you’ve gone overboard? In this video, Mark Denney talks about editing landscape photos and shares with you five signs that will tell you when editing has become over-editing. In my opinion, landscape photography is one of the most common genres where photographers go overboard with editing. I think that it’s easy to overlook the signs that you’ve gone too far, especially if you spend a lot of time working on an image. Unfortunately, once you share the photo, your viewers will definitely see if it’s been over-edited. So, to prevent this from happening, focus on these five signs so you can tell more easily if you have to tone it down.
1. Unrealistic highlights and shadows
It will happen that you blow out the highlights in your image. If you shoot into the sun, it will always be blown out. You can darken the highlights down to some point, but it’s easy to overdo it. How will you know? Well, if a dark-orange circle appears around the white sun, it means that you’ve definitely overdone it. The sun is bright, so it’s okay if it’s blown out in the image.
On the other hand, you can also be tempted to brighten the shadows. Shadows are an important part of the photo, as they give it three-dimensionality and structure. And if you brighten them too much and the photo starts to look flat, it means you have to tone it down.
2. Adding too much contrast
Adding contrast can make or break the image. However, it can be difficult to figure out when you’ve added too much of it. Mark suggests that you pay attention to the shadows when adjusting contrast. If they turn too dark and you lose all the detail in the shadows, it means you’ve gone too far with the contrast slider.
3. Over-sharpening and clarity
If your image is not perfectly sharp, be it from the camera shake or from not focusing properly, you may want to try and fix it. This can easily lead to over-sharpening and making the photo look rough and gritty.
A great way to see if you’ve overdone it is to look for the areas where you have something dark against the bright background. If you overdo the sharpening and clarity, you’ll see a halo around the dark edges, and it definitely means that you’ve gone way too far.
4. Extreme vignetting
A lot of beginners go overboard with vignetting when they start post-processing their photos. And just like everything you do in post, vignette should be there, but it shouldn’t be obvious. It should enhance your photo, but if it becomes a distraction instead, it means that you should tone it down.
5. Oversaturated colors
Oversaturation is also one of the most common mistakes landscape photographers make when editing. And Mark points out that it’s also the most difficult one to figure out. I understand what he’s saying: it has happened so many times that I see a photo and know that it’s oversaturated, but I don’t know exactly how to justify my impression.
This is what Mark recommends for identifying if the photo is over-saturated: zoom all the way in, and if you start losing detail as you increase saturation, it means that you need to tone it down. However, you’ll start losing detail only if you crank up the saturation all the way to 100, and no one does that. So, the best piece of advice Mark can give (and I would agree): edit your image, open it in full-screen mode, and then walk away. Take a break from editing for about half an hour, and then get back to it. It will be much easier to realize if you’ve gone too far with saturation after you take a break.
As we learn about photography and post-processing, we will make mistakes and it’s all a part of learning. But knowing how to identify them certainly helps us make a progress faster and become better in what we do.
This article is written by Dunja Djudjic and appeared here.
This image is collected from here.