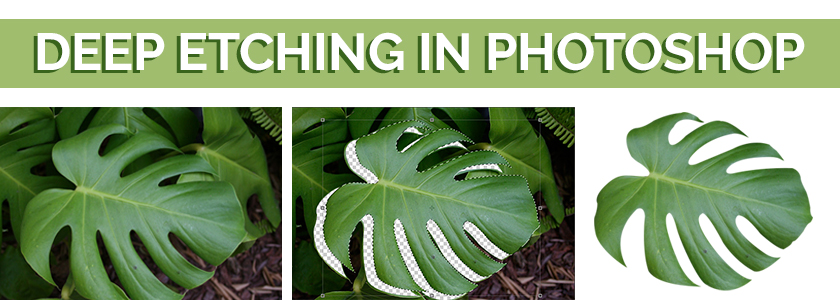
Deep etching is something which, I think, most graphic designers love to hate! That being said, it is probably one of the more frequently used techniques in Photoshop.
Whether it be to highlight an object by blurring the background; to make a specific colour “pop” in a black and white photo or to simply place a product on a white background – these objectives can only be achieved by DEEP ETCHING said object!
Deep etching is basically the digital version of cutting something out (like you used to do with an image from a magazine and then pasted it onto another image or plain background) – you cut it out digitally in Photoshop and place that image onto something else.
So where does one even begin? Well … perfecting the art of deep etching takes some practice – and a lot of patience – so it is probably a good idea to start with a reasonably simple object (preferably nothing that has hair!).
Select the pen tool in Photoshop (this is the icon that looks like the tip of an old fashioned fountain pen) and slowly start tracing the outline of the object. It is a good idea to zoom in on the photo as this will allow one to create a more accurate line. The idea is that you create an outline around the object with as few nodes as possible (nodes are those little square things that the pen tool creates when you click!). Create your first node by clicking down once at a point along the invisible outline of your object. Move to the next point along the outline and create another node, but this time, hold down the mouse key and drag your mouse to the left or to the right – you will see that the node now has handles which allow you to easily create curves to follow the invisible outline of your chosen object. If you wish to “deactivate” the handles on a node, simply hold down alt and re-click on said node.
Once you have completed your ‘path’, by joining your first and last nodes, it’s a good idea to save it – and your document. This will help to avoid any major mental breakdowns that may occur if the power trips after you have spent many painfully, strained minutes trying to perfect your path! Simply click on the “Paths” tab in Photoshop, select the little drop down arrow in the top right-hand corner and select “Save Path”… and then save your Photoshop document!
And that’s it! Your object has been deep etched. The next step is to decide what you would like to do with the selected object. One option would be to create a clipping path. This will allow you to place the image into an InDesign document and only the selected object will be visible – without the background. However – when that photo/link is opened in Photoshop, the background is still there! Click the small drop down arrow on the paths tab and select “Clipping Path”. When it asks for “Flatness” select “2”.
Now save your scan as an .eps file and once placed into InDesign you will see that the background is no longer visible. Great for when working on product catalogues.
This article is written by Lara Jansen van Rensburg and appeared here.
The image is collected from here.
