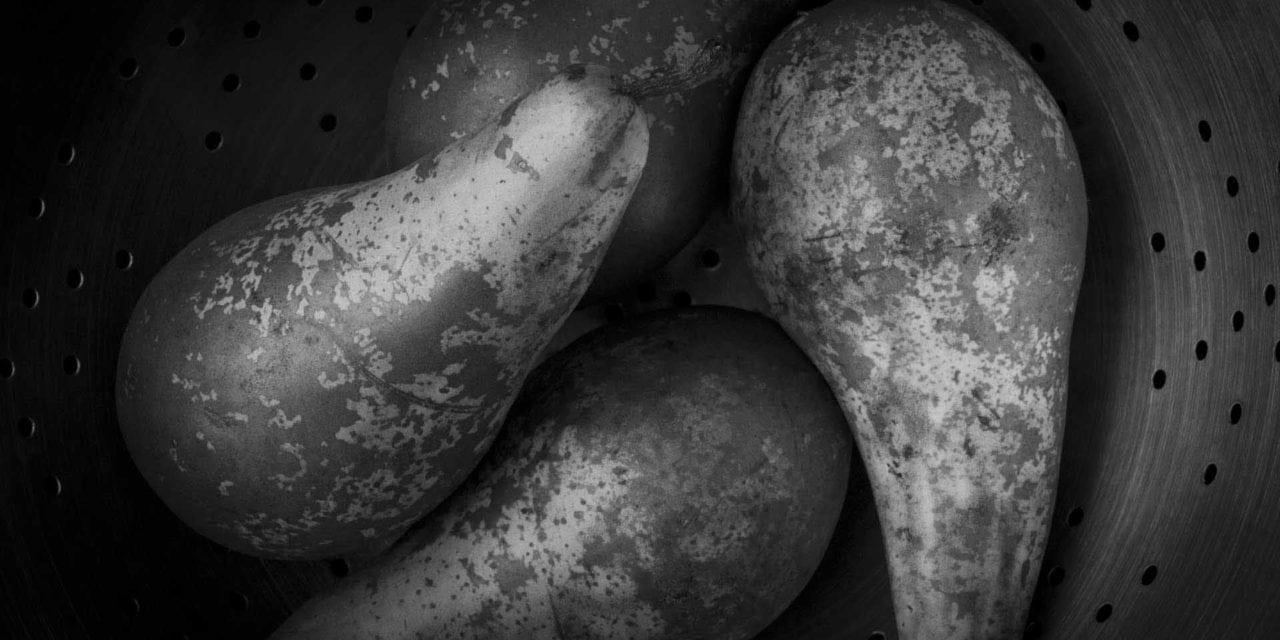
Many photographers have said to me that they don’t like spending hours at the computer editing their images, but in many cases you don’t actually need to spend very long at all. In fact I think in most instances you can make quite dramatic changes in just 5 minutes.
In the first of a new series called ‘5 minutes in Photoshop’ I’m going to show you how to crop an image square and then convert it to monochrome. I’ll be working on the raw file that’s come straight from the camera and using Adobe Camera Raw which is supplied with Photoshop, it also forms the backbone of Lightroom so you should be able to make the same adjustments using that software if you prefer. If you have signed-up to the Adobe Photography Plan you have access to both Photoshop and Lightroom.
Use this link to download the raw files and try the adjustment process for yourself. There’s also a final version of the image so you can see what you’re aiming for.
I use Adobe Bridge (also provided with Photoshop and the Adobe Photography Plan) to browse through images and when a raw files is double-clicked it opens automatically in Camera Raw. Alternatively you can locate the image you’re interested in, right click on it and then select Open with Adobe Photoshop CC 2017 – it automatically opens in Camera Raw.
Once the image is open in Camera Raw just follow these steps:
1. Click and hold on the crop tool to reveal the aspect ratio options then move the cursor down to select 1 to 1.
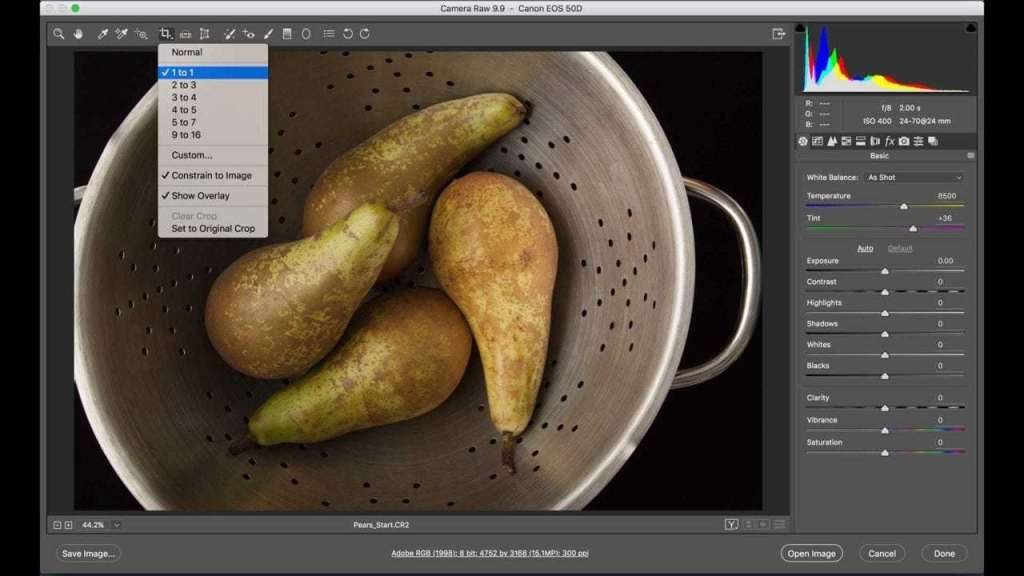
2. Click inside the image where you want the crop to start and drag across to the opposite corner. The crop will automatically stay square.
3. You can click and drag any of the crop corners to adjust the crop area. Click inside the crop area and drag to move the crop zone until you’re happy with the crop.
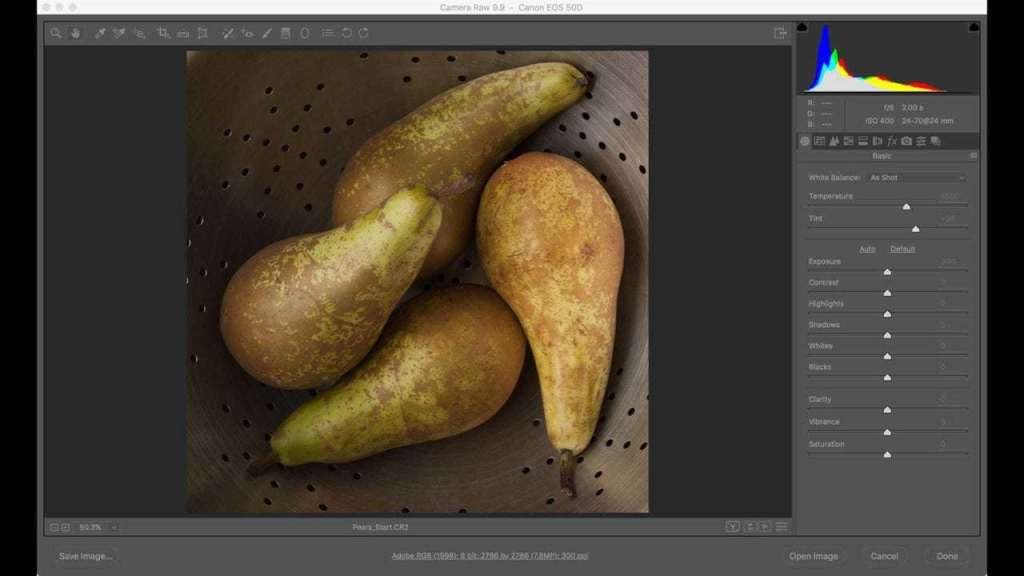
4. Click on the hand tool to reveal the adjustment controls in the column on the right. The Basic controls will be visible below the histogram.
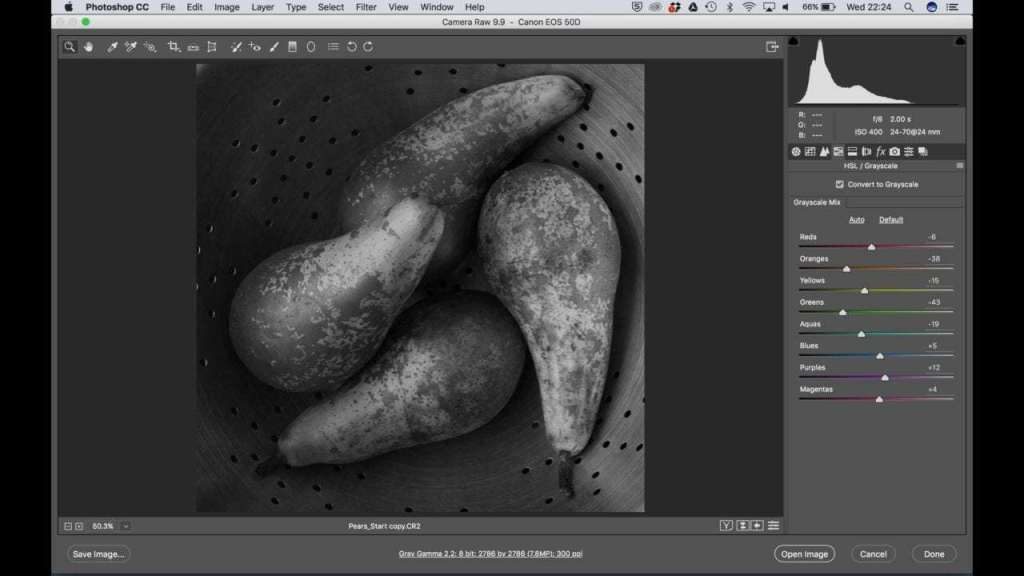
5. Click on the HSL/Grayscale icon, it’s the fourth in the row in the column on the right, and put a tick in the Convert to Grayscale box.
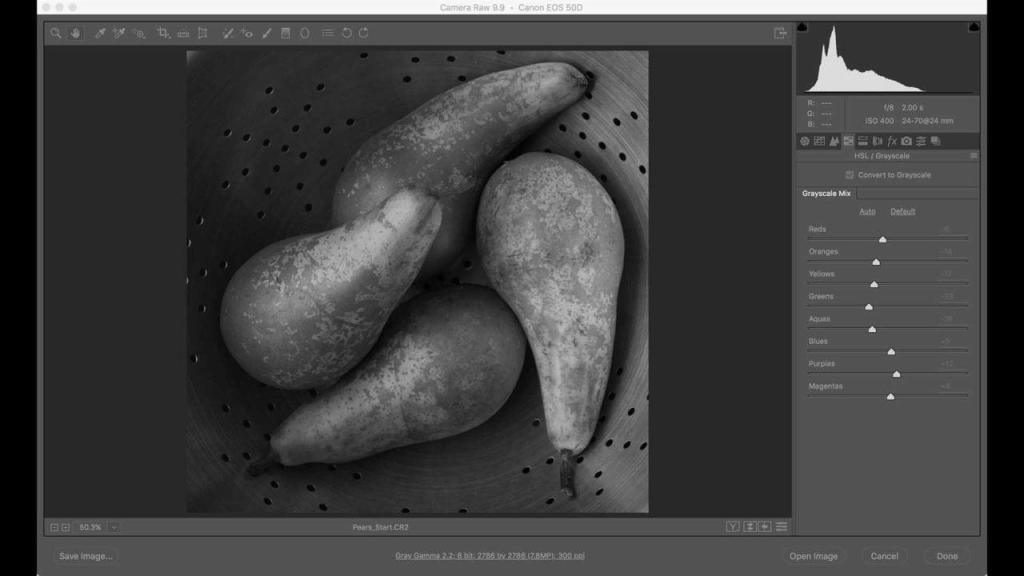
6. The image has now turned monochrome but it’s just a basic conversion. You can adjust the brightness and contrast of the image using the 8 sliding controls. Sliding a control to the right brightens the areas that contain that colour in the original image, sliding it left darkens them. This image of a colander of pears is mainly made up of yellows with some greens and oranges. That means that the Yellows slider has the biggest impact with this image. The combination of settings is determined by eye and it’s just a question of deciding what works best for you. If you want to go back to the starting point tap Auto. Clicking Default sets all the values to 0. For this image I only adjusted the Oranges, Yellows and Greens and I left the other colours at their Auto settings. The final values were:
Reds -6
Oranges -38
Yellows -15
Greens -43
Aquas -19
Blues +5
Purples +12
Magentas +4
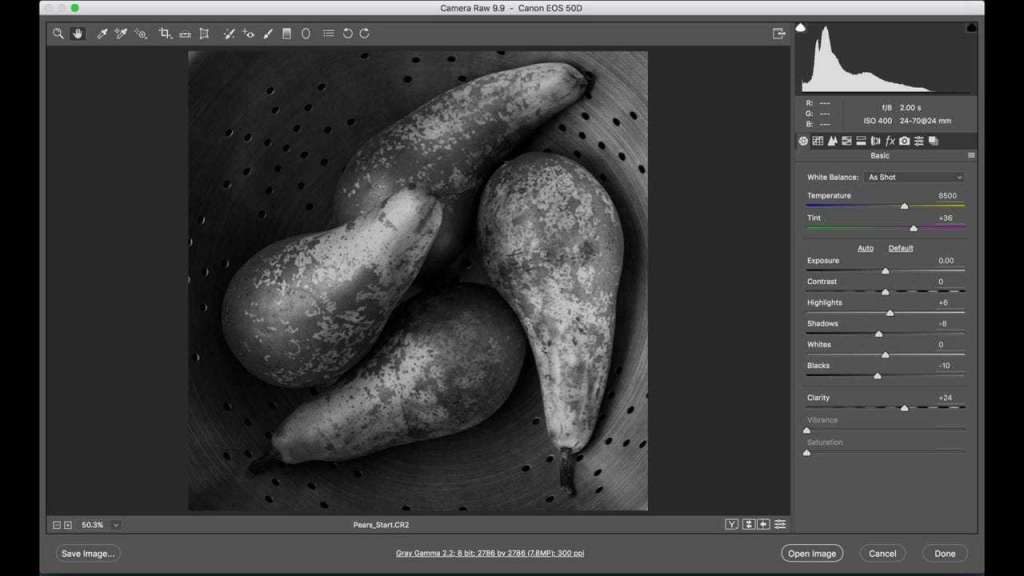
7. Once the image is nearly there, click on the Basic icon again and boost the clarity (+24) to inject a bit of bite. I also tweaked the contrast by dragging the Highlight slider right (+6) and the Shadows and Black sliders left (-8 and -10).
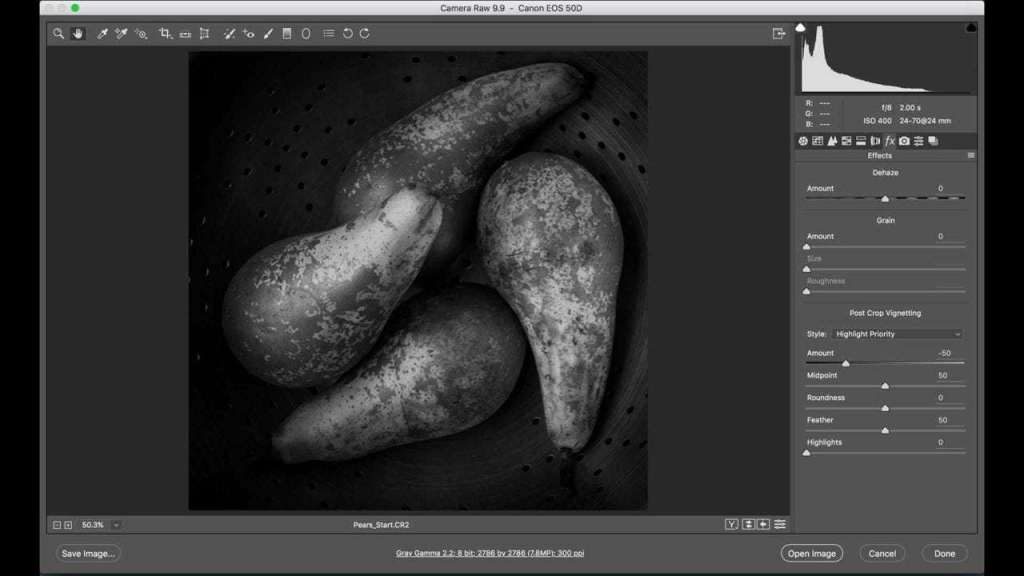
8. As a final touch, click the FX icon and use the Amount slider under Post Crop Vignetting to darken the corners. I used a setting of -50
9. Once you’re happy with the image, click Save As (in the bottom left corner of the screen) to save a version of the image with all the settings applied. Working down from the top of the dialogue box that appears, Select a folder where you’d like to save the image (it can be in the same folder as the image or you can create a new folder), the use the File Naming dropdown boxes to set the naming structure for your final image. Under Format you have the choice between Digital Negative, JPEG, TIFF and Photoshop.
